Next.js 14 Environment settings, Set up, Project structure

Creating a Project
🔗First, you need to have Node.js installed. Then, you can open the terminal and use
npx create-next-app@latest
to create a Next.js project. (This method quickly creates and sets up the necessary and default files for a Next.js project.)
During the initial setup, you will see the following prompts:
TerminalWhat is your project named? my-app
Would you like to use TypeScript? No / Yes
Would you like to use ESLint? No / Yes
Would you like to use Tailwind CSS? No / Yes
Would you like to use `src/` directory? No / Yes
Would you like to use App Router? (recommended) No / Yes
Would you like to customize the default import alias (@/*)? No / Yes
-
The choice of TypeScript depends on your familiarity with the language. For someone like me transitioning from backend to full-stack development and not very familiar with JavaScript, TypeScript provides static type checking, which can catch potential errors during development and improve code stability and readability. It is recommended to choose TypeScript.
-
ESLint is an open-source tool for checking and fixing JavaScript code style and errors. It is very useful and recommended.
-
Tailwind CSS can be chosen based on your needs.
-
Choosing the
src/directory will add an extrasrc/folder on top of the original program folder, essentially adding an extra layer of directories. This allows you to separate code from configuration files, making project organization clearer. It is recommended to use this option. -
Customizing the default import alias (@/*) simplifies import statements by allowing you to set custom import aliases. This means you can use "@" or other custom symbols instead of long absolute paths, which can be useful based on your needs.
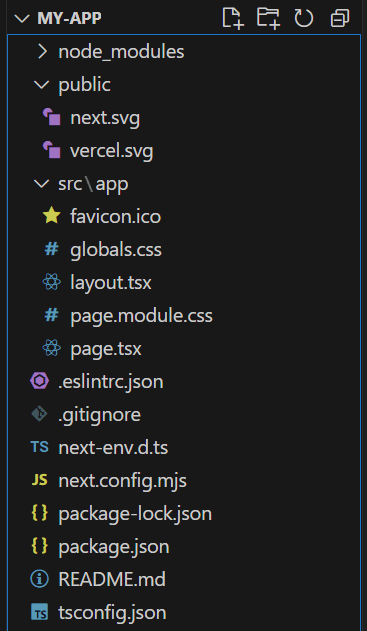
After the setup is complete, the project structure will be as follows:

package.json
🔗Open the configuration file, and you will see that the libraries needed for both production and development environments are already included in the project.
dependencies & devDependencies
🔗JSON "dependencies": {
"react": "^18",
"react-dom": "^18",
"next": "14.1.0"
},
"devDependencies": {
"typescript": "^5",
"@types/node": "^20",
"@types/react": "^18",
"@types/react-dom": "^18",
"eslint": "^8",
"eslint-config-next": "14.1.0"
}
scripts
🔗JSON "scripts": {
"dev": "next dev",
"build": "next build",
"start": "next start",
"lint": "next lint"
}
next dev: To start the Next.js project in development mode with support for Hot Module Replacement (HMR) and automatic page refreshing.
next build: Before deploying to production environment, run to generate optimized code.
next start: Run the project when the application has been built and is ready for deployment.
next lint: Configure ESLint in the project.
src/app
🔗The app directory is the main area for placing code, including CSS and TSX files. Since the src/ directory was chosen during the initial project setup, an additional src/ layer is added above. For future API additions, you can create an api directory under src/. Personally, I find this classification method more organized.
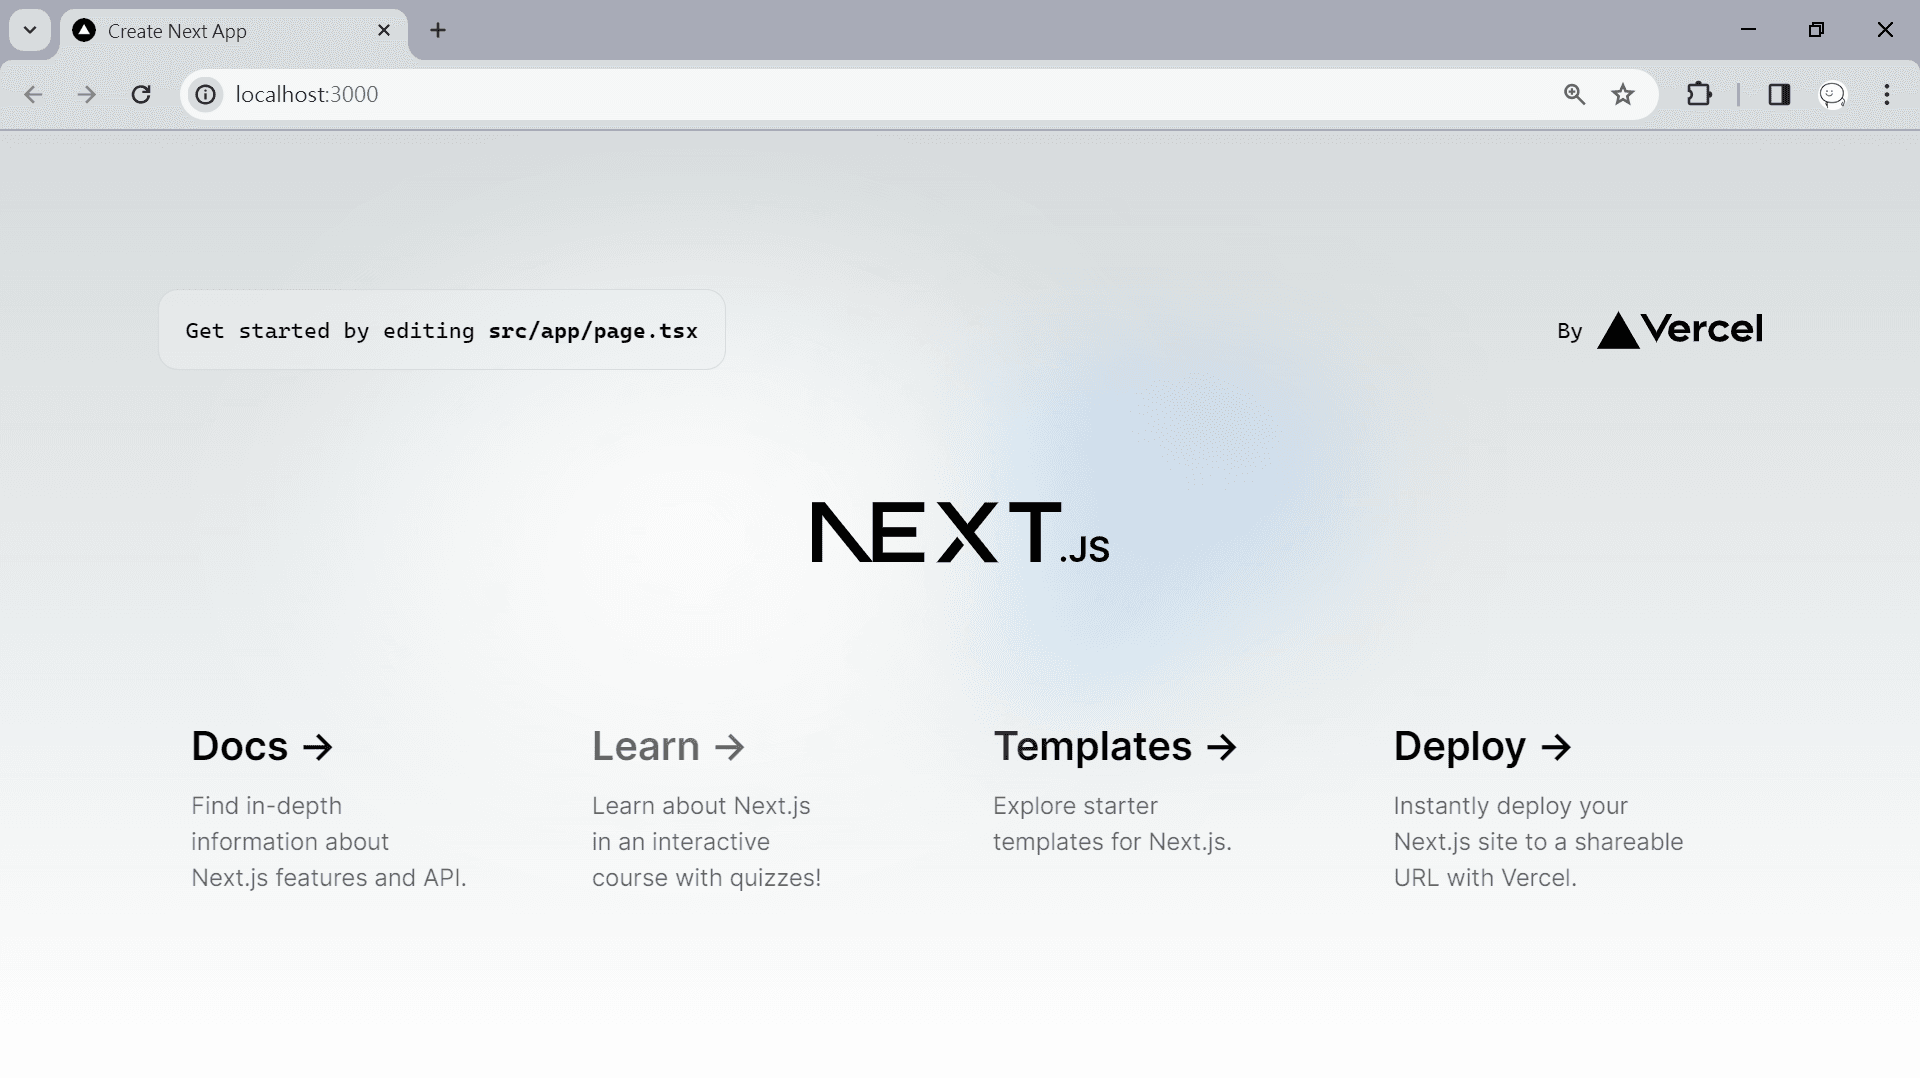
Start the project
🔗Use
npm run dev
Open your browser to view the project interface.

Conclusion
🔗This article documents the Next.js project structure and how to start the project. Next, I will share the file system routing mechanism, including how to create and navigate pages.
Alvin
Software engineer who dislikes pointless busyness, enjoys solving problems with logic, and strives to find balance between the blind pursuit of achievements and a relaxed lifestyle.


