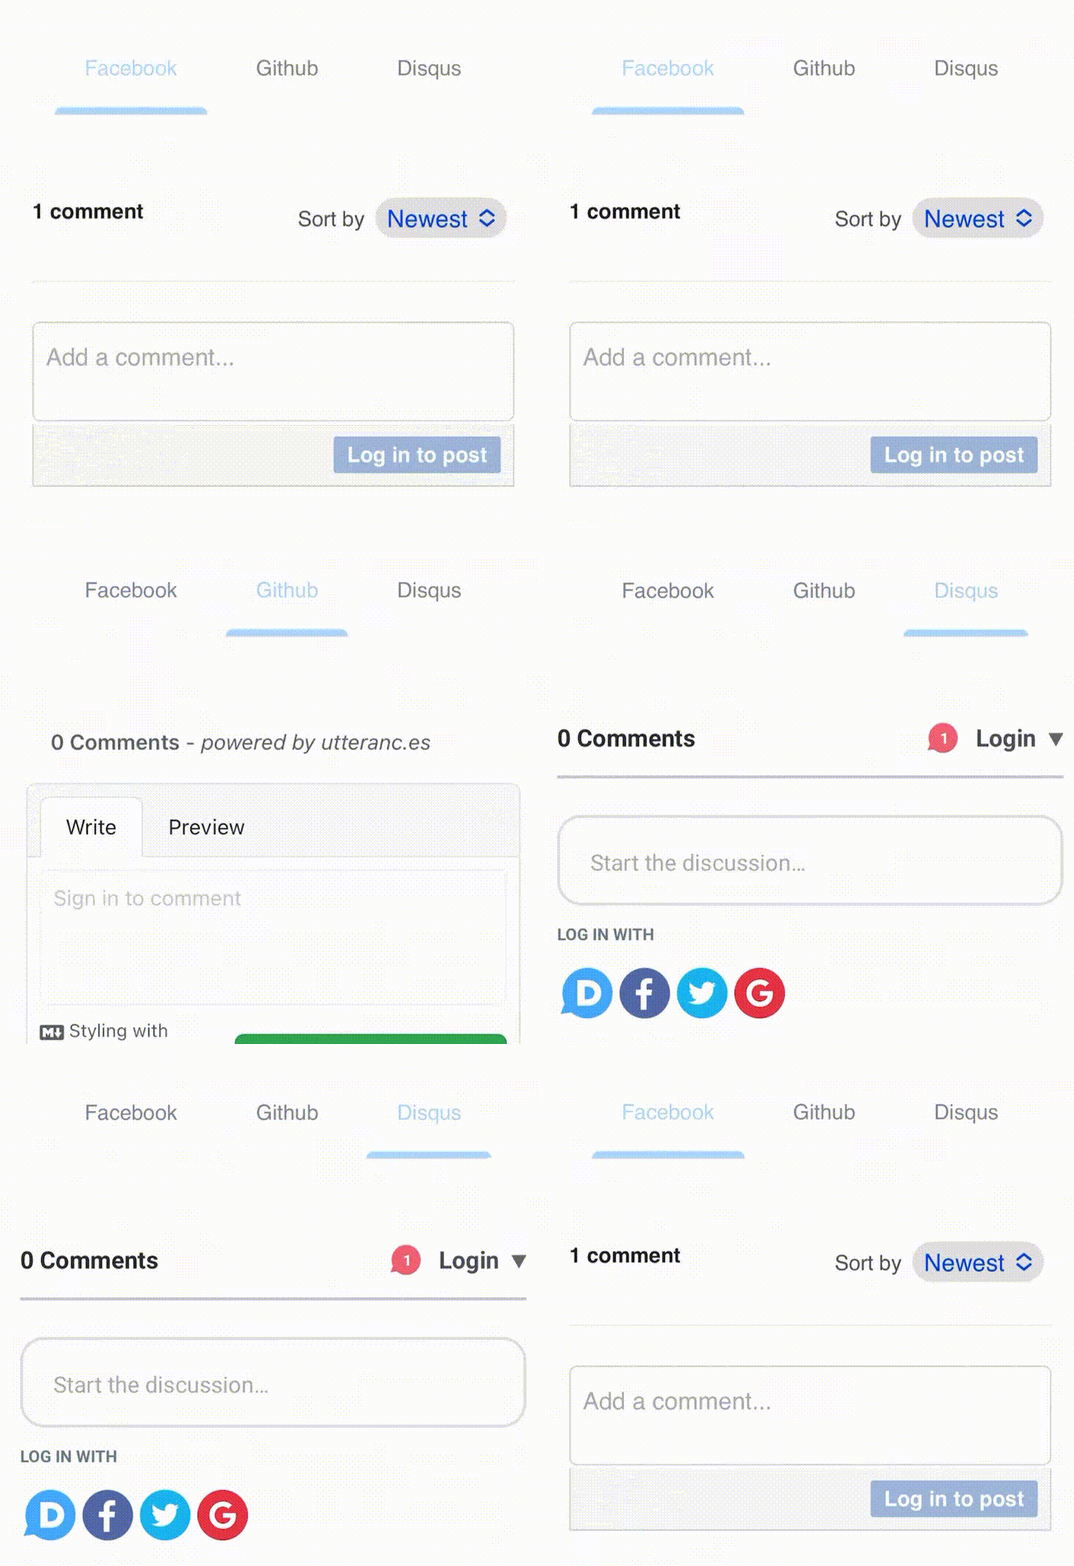
Hugo 實現提供多種留言版選擇

前言
🔗如果有經營個人網站的習慣,相信大家都會想要與參訪的人有互動,網路上也很多教學提供第三方快速建置留言板的功能。像是Disqus、Gitalk、Utterances、Commento、FB...等。
但我自己在閱讀文章的習慣與體驗上,有時候想留言,卻因為對方使用的是Facebook Comments Plugin,並不想透漏太多個人訊息,或是非工程師的人想詢問,網站卻只提供需要Github帳號的Utterances、Gitalk留言功能,或是還要在額外註冊帳號的Disqus,導致想留言的興致瞬間降低,所以我想說乾脆把能想到的留言功能都開放,這樣子如果再沒人留言,應該就是自己文章寫的太爛了吧。😂
想法
🔗我的作法是直接提供各個留言板,但是在CSS的部分得先對整個留言板隱藏。留言板上方給予使用者一個選單,點選特定留言板按鈕同時修改CSS,讓該留言板顯示,其餘的則是改為隱藏。
程式碼
🔗HTML的部分,有幾種留言板就增加幾個button,範例總共會使用Facebook、Github跟Disqus的套件,所以就會有三個按鈕。
為了避免修改到Hugo原本的主題,可以對根目錄\layouts\_default\single.html修改。
(若沒有此檔案可以從根目錄\themes\主題\layouts\_default\single.html複製過去)
HTML加在single.html裡{{ partial "comments.html" . }}的下方。
HTML<nav class="nav">
	<button id="fb-btn" class="nav-item is-active" active-color="#ACD6FF">Facebook</button>
	<button id="github-btn" class="nav-item" active-color="#ACD6FF">Github</button>
	<button id="disqus-btn" class="nav-item" active-color="#ACD6FF">Disqus</button>
	<span class="nav-indicator"></span>
</nav>
在HTML中為每個按鈕添加一個ID,以便JavaScript可以使用它來確定應該顯示哪個留言板。
以下的CSS與JS則是網路上的一些素材,對按鈕做一些修飾與增加點選的動態效果,畫面部分可以依據自己喜好做修改。
CSS.nav {
		display: inline-flex;
		position: relative;
		overflow: hidden;
		max-width: 100%;
		background-color: #fff;
		padding: 0 20px;
		border-radius: 40px;
		box-shadow: 0 10px 40px rgba(255, 255, 255, 0.8);
		display: flex;
		justify-content: center;

	}

	.nav-item {
		color: #83818c;
		padding: 20px;
		text-decoration: none;
		transition: .3s;
		margin: 0 6px;
		z-index: 1;
		font-family: 'DM Sans', sans-serif;
		font-weight: 500;
		position: relative;

		&:before {
			content: "";
			position: absolute;
			bottom: -6px;
			left: 0;
			width: 100%;
			height: 5px;
			background-color: #dfe2ea;
			border-radius: 8px 8px 0 0;
			opacity: 0;
			transition: .3s;
		}
	}

	.nav-item:not(.is-active):hover:before {
		opacity: 1;
		bottom: 0;
	}


	.nav-item:not(.is-active):hover {
		color: #333;
	}

	.nav-indicator {
		position: absolute;
		left: 0;
		bottom: 0;
		height: 4px;
		transition: .5s;
		height: 5px;
		z-index: 1;
		border-radius: 8px 8px 0 0;
	}

	.nav-item {
		border: none;
		outline: none;
		background-color: #fff;
	}

	@media (max-width: 580px) {
		.nav {
			overflow: auto;
		}
	}
JavaScriptconst indicator = document.querySelector('.nav-indicator');
	const items = document.querySelectorAll('.nav-item');

	function handleIndicator(el) {
		items.forEach(item => {
			item.classList.remove('is-active');
			item.removeAttribute('style');
		});

		indicator.style.width = `${el.offsetWidth}px`;
		indicator.style.left = `${el.offsetLeft}px`;
		indicator.style.backgroundColor = el.getAttribute('active-color');

		el.classList.add('is-active');
		el.style.color = el.getAttribute('active-color');
	}


	items.forEach((item, index) => {
		item.addEventListener('click', (e) => { handleIndicator(e.target) });
		item.classList.contains('is-active') && handleIndicator(item);
	});
這時可以看到還沒有任何功能的選單。

選單下方就是接著顯示留言板的區塊,因為我想要畫面的預設是facebook的留言功能,在fb的區塊加上style="display: block;";其他的留言板則是加上 style="display: none;" 。
(此篇不提供加入各種留言板的教學)
HTML
<div id="disqus-comments" class="comments markdown" style="display: none;">
	{{ partial "disqus.html" . }}
</div>

<div id="utterances-comments" class="comments markdown" style="display: none;">
	<script src="https://utteranc.es/client.js" repo="your repo" issue-term="pathname"
		theme="github-light" crossorigin="anonymous" async>
		</script>
</div>

<div id="facebook-comments" class="fb-comments" data-href="your url" data-width="100%" data-numposts="5" style="display: block;"></div>
接下來就是使用JS讓點選按鈕時,可以同時修改CSS,做到隱藏或顯示留言版的效果。
JavaScript  // get button element
	const githubBtn = document.getElementById("github-btn");
	const disqusBtn = document.getElementById("disqus-btn");
	const fbBtn = document.getElementById("fb-btn");

	// get message board element
	const githubBoard = document.getElementById("utterances-comments");
	const disqusBoard = document.getElementById("disqus-comments");
	const fbBoard = document.getElementById("facebook-comments");
	// Add click event listeners to each button
	githubBtn.addEventListener("click", function () {
		githubBoard.style.display = "block";
		disqusBoard.style.display = "none";
		fbBoard.style.display = "none";
	});
	disqusBtn.addEventListener("click", function () {
		githubBoard.style.display = "none";
		disqusBoard.style.display = "block";
		fbBoard.style.display = "none";
	});
	fbBtn.addEventListener("click", function () {
		githubBoard.style.display = "none";
		disqusBoard.style.display = "none";
		fbBoard.style.display = "block";
	});
使用document.getElementById方法選取每個按鈕元素,然後為其添加一個點擊事件監聽器。當按鈕被點擊時,修改CSS來顯示或隱藏對應的留言板。
結語
🔗成品!!

會有這樣子的想法有一部分也是因為自己選擇困難,第三方留言功能套件實在太多了,只好全都要。😎
Alvin
軟體工程師,討厭瞎忙,喜歡用邏輯解決問題,努力在盲目追求成就感與放鬆的生活中取得平衡。


