Implementing Real-Time Communication with WebSocket using SignalR and .NET 6 Web API - Part 1
Foreword
🔗In our company's projects, we used to integrate with Flask-SocketIO which developed by other colleagues, for real-time communication. However, our backend team primarily uses C#, and our manager has been wanting us to develop our own C# WebSocket communication for quite some time. As someone who is junior backend engineer, understanding the entire communication process (including the frontend) has been quite challenging. So, I decided to document my testing process.
Principle
🔗WebSocket is a protocol that differs from the traditional API used for communication between front-end and back-end. It enables the establishment of a persistent, bi-directional connection. In traditional API requests, every time a client needs to fetch data from the server, it sends an HTTP request and waits for the server's response. Such requests and responses are stateless, meaning they are independent of each other.
WebSocket, on the other hand, allows for ongoing communication once the connection is established. Clients and servers can directly send data to each other without needing to reestablish the connection. This significantly reduces communication overhead, improves communication efficiency, and supports applications with high real-time requirements, such as multiplayer games, chat rooms, and real-time monitoring.
SignalR
🔗SignalR is a library for the ASP.NET Core framework used to build real-time web applications. It allows server-side code to push new information to the WebSocket connections established with clients, enabling clients to receive this information in real-time. While ASP.NET Core also provides a WebSocket library, Microsoft recommends choosing SignalR for implementing real-time communication. This is because SignalR builds upon WebSocket connections and offers advanced features such as automatic reconnection, grouping, broadcasting, serialization, and more. With SignalR, it becomes easier to create efficient real-time web applications and reduces development complexity. Hence, SignalR is the chosen framework for this project.
Test
🔗When I was initially assigned the task of implementing real-time communication, I must admit that it was quite challenging. After all, it operates differently from the traditional data transmission model. As a backend engineer, if you want to test APIs, you can use Swagger for testing. However, for real-time communication, testing involves checking the connection, message transmission, and disconnection. Since the frontend team is quite busy, I had to take on the testing myself. 😗
In addition to connection and disconnection testing, in terms of message transmission, it is crucial to note that all connections are made to the same server Hub. (A Hub is an abstract concept that describes a logical connection point between clients and the server.) Typically, connections with the same functionality are made to the same Hub. Therefore, it is vital to ensure that messages are sent from the same Hub to the specified clients. Sending the wrong message can be quite embarrassing. 😂
Next, the message transmission will be tested for broadcasting to all clients, group broadcasting, and targeted message transmission.
Create Web API Project
🔗Use Visual studio to click Create a new project > ASP.NET Core Web API > choose a good project name > select .Net 6.0 > Create
The project structure is as follows:
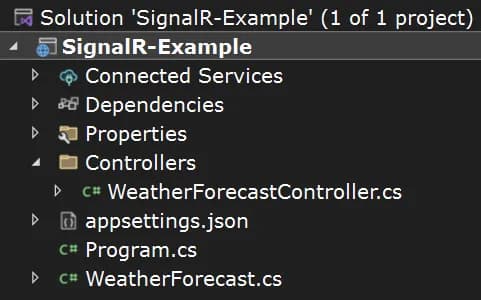
SignalR-Example/
├── Connected Services/
├── Dependencies/
├── Properties/
│   ├── launchSettings.json
├── Controllers/
│   ├── WeatherForecastController.cs
├── appsettings.json
│   ├── appsettings.Development.json
├── Program.cs
├── WeatherForecast.cs
The next step is to add the SignalR library
Click Tools above Visual studio > NuGet Package Manager > Manage NuGet Package for Solution
Download the SignalR NuGet package

Create SignalR Hub
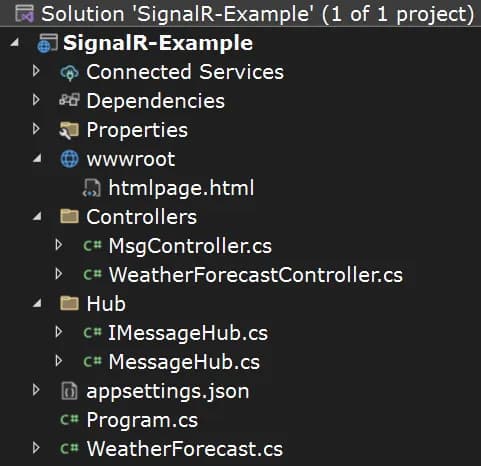
🔗Add Hub folder > Add IMessageHub.cs interface under Hub > Add a sendToAllConnections method to send messages to all connected users
C#namespace SignalR_Example.Hub
{
    public interface IMessageHub
    {
        Task sendToAllConnections(List<string> message);
    }
}
Add MessageHub.cs under the Hub folder
C#using Microsoft.AspNetCore.SignalR;
namespace SignalR_Example.Hub
{
    public class MessageHub: Hub<IMessageHub>
    {
        public async Task sendToAllConnections(List<string> message)
        {
            await Clients.All.sendToAllConnections(message);
        }
    }
}
Next, add a Controller that provides the push function, and select Add API Controller - Empty :
MsgController.cs
C#using Microsoft.AspNetCore.Http;
using Microsoft.AspNetCore.Mvc;
using Microsoft.AspNetCore.SignalR;
using SignalR_Example.Hub;

namespace SignalR_Example.Controllers
{
    [Route("api/[controller]")]
    [ApiController]
    public class MsgController : ControllerBase
    {
        private IHubContext<MessageHub, IMessageHub> messageHub;
        public MsgController(IHubContext<MessageHub, IMessageHub> _messageHub)
        {
            messageHub = _messageHub;
        }
        [HttpPost]
        [Route("toAll")]
        public string ToAll()
        {
            List<string> msgs = new List<string>();
            msgs.Add("Don't forget, the deadline for submitting your expense reports is this Friday.");
            msgs.Add("Friendly reminder, please refrain from using the conference room for personal calls or meetings without prior approval.");
            messageHub.Clients.All.sendToAllConnections(msgs);
            return "Msg sent successfully to all users!";
        }
    }
}
Added an API and injects the IHubContext included in SignalR to provide the function of sending messages to everyone.
In order to confirm whether the front end is connected to the Hub and the subsequent test message transmission, it is necessary to add an html page to the project (it can also directly avoid CORS):
Add wwwroot under the project, and add an html file under it.
wwwroot is a special directory in ASP.NET Core for storing static resource files such as HTML, CSS, JavaScript, images, etc. In an ASP.NET Core application, users can access the files in this directory by directly entering the URL from the browser, because these files can be loaded directly from the web page request.
Add htmlpage.html, because it is mainly to realize the back-end function, the communicate information just displayed on the console.
Html<!DOCTYPE html>
<html>
<head>
    <meta charset="utf-8" />
    <title>SignalR TEST </title>
    <script src="https://cdn.jsdelivr.net/npm/@microsoft/[email protected]/dist/browser/signalr.min.js"></script>
    <script>
        // Establish SignalR Hub connection
        const hubConnection = new signalR.HubConnectionBuilder()
            .withUrl("https://localhost:7013/messageHub/")
            .build();

        hubConnection.start()
            .then(() => {
                console.log("Connection started");
            });
        // Register the "sendToAllConnections" event of the MessageHub
        hubConnection.on("sendToAllConnections", function (msgs) {
            console.log(msgs);
        });
    </script>
</head>
<body>
    SignalR TEST
</body>
</html>
Next, we need to adjust the SignalR and CORS policy settings, as well as make some configurations for reading static data in Program.cs.
Annotated items are newly added items
C#using SignalR_Example.Hub;

var builder = WebApplication.CreateBuilder(args);

// Add services to the container.
builder.Services.AddSignalR();   // Register SignalR services

builder.Services.AddCors(options =>    //  Register CORS services to allow cross-origin requests
{
    options.AddPolicy("CorsPolicy", builder =>
    {
        builder.AllowAnyOrigin()
            .AllowAnyHeader()
            .AllowAnyMethod();
    });
});
builder.Services.AddControllers();
builder.Services.AddEndpointsApiExplorer();
builder.Services.AddSwaggerGen();

var app = builder.Build();

// Configure the HTTP request pipeline.
if (app.Environment.IsDevelopment())
{
    app.UseSwagger();
    app.UseSwaggerUI();
}
app.UseCors("CORSPolicy");   // Use the defined CORS policy
app.UseHttpsRedirection();

app.UseAuthorization();

app.MapControllers();
app.UseFileServer();    // Use built-in middleware to serve static files
app.MapHub<MessageHub>("/messageHub");   // Map SignalR Hub to "/messageHub" (connection string on the frontend)
app.Run();
Conclusion
🔗Start the project, open swagger and https://localhost:7013/htmlpage.html to confirm whether the front end has received the message when calling the API.
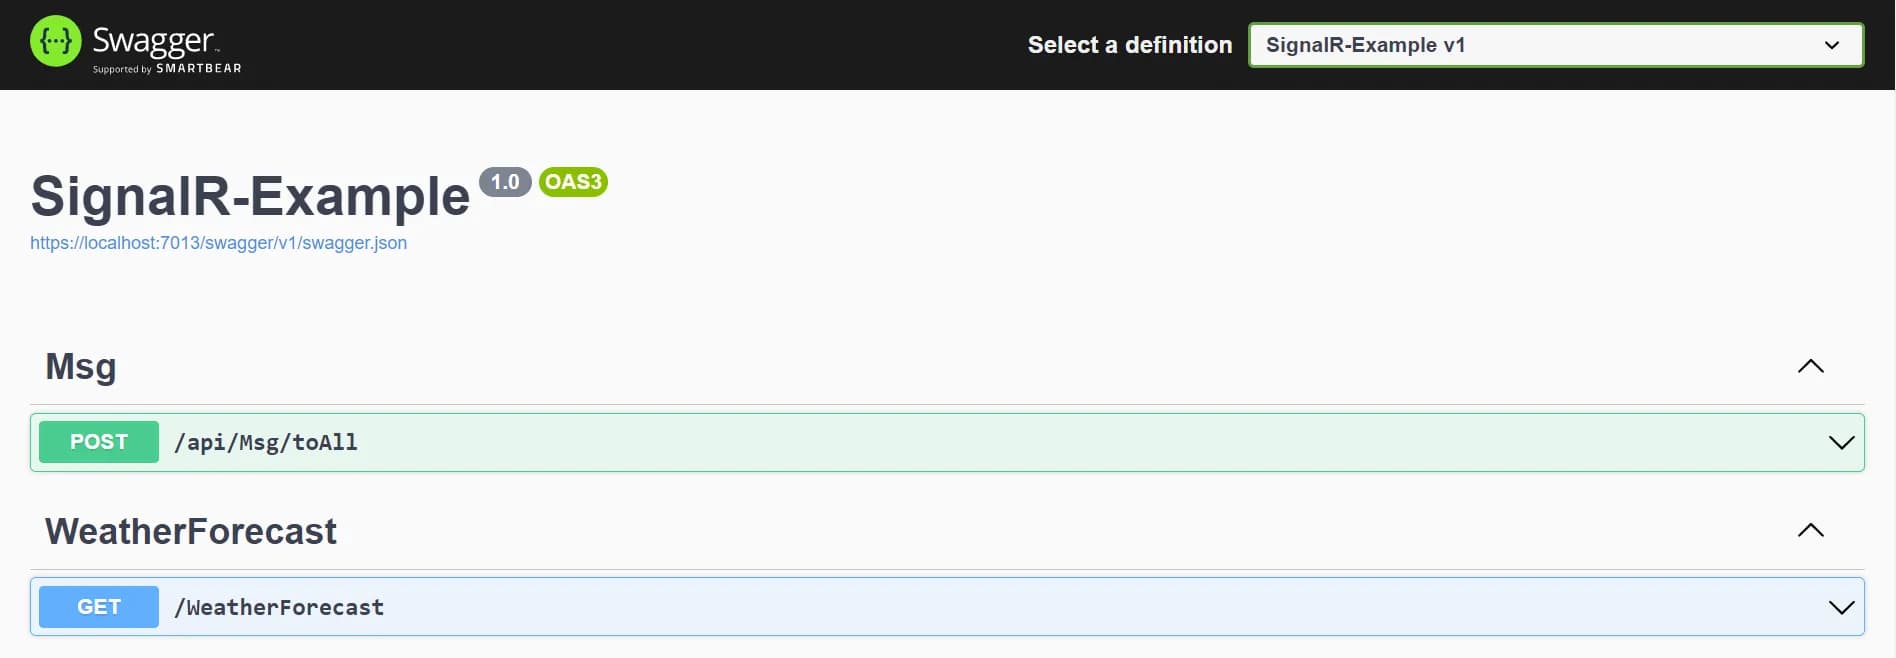

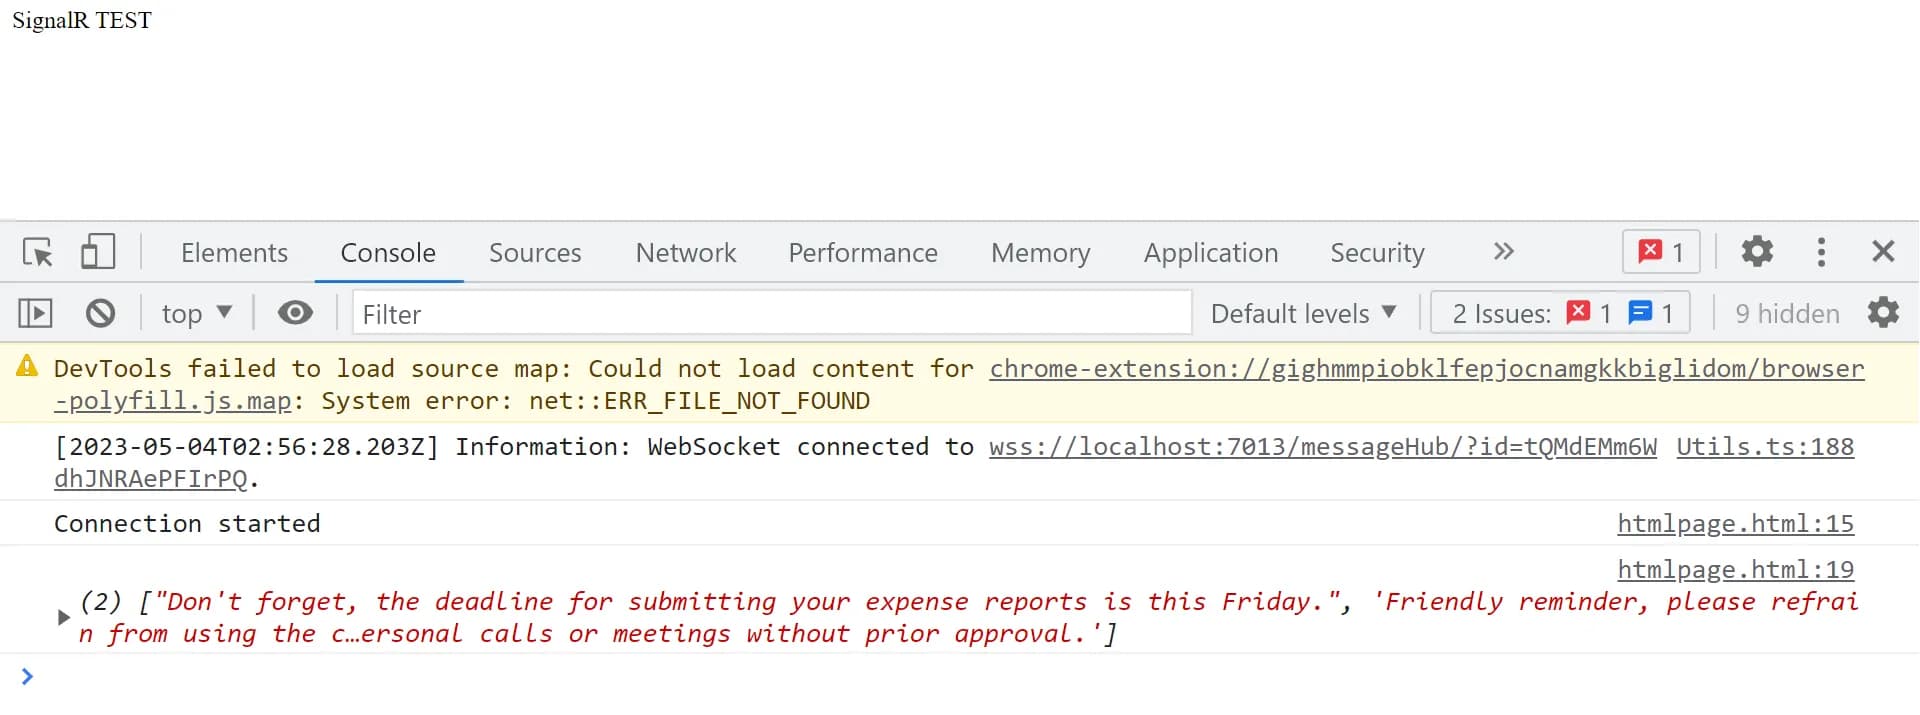
The above implements the function of sending messages to all connected users.
Reference
The next article will introduce how to pushing specific users:
Implementing Real-Time Communication with WebSocket using SignalR and .NET 6 Web API - Part 2
Alvin
Software engineer who dislikes pointless busyness, enjoys solving problems with logic, and strives to find balance between the blind pursuit of achievements and a relaxed lifestyle.

