Implementing Real-Time Communication with WebSocket using SignalR and .NET 6 Web API - Part 2
Foreword
🔗The previous article has introduced how to use full push. As long as there is a connection, users can receive the message. Next, we will simulate the function of pushing to a specific user.
Principle
🔗WebSocket communication, as long as the user connects, a connection ID will be automatically generated. If the program logic is that when the user performs an operation, it is very easy to push a message to it. Just send a message for the current connection ID directly. But in fact, the logic may be more complicated. Usually, user A performs an operation, or wants to directly send a message to another user B. In this case, a specific user ID and connection ID must be bound. In this way, when pushing, the connection ID can be obtained and pushed through the known user ID.
Mapping Users to Connections ID
🔗Typically, when a user connects, it is necessary to store both the user ID and the connection ID. This allows for querying the connection ID associated with a specific user when broadcasting messages. There are two main methods for storing this information: in-memory storage and database storage.
Storing the information in memory offers better performance advantages. However, if the server restarts, the related information will be lost. On the other hand, storing the information in a database allows for permanent data storage but may result in slightly lower performance.
The choice between these methods depends on the specific application requirements and considerations.
Detailed information can be found in the tutorial: Mapping SignalR Users to Connections
Test
🔗By default, when a user connects, they need to enter a username, and when they click "login", the username will be sent to the backend, which immediately binds the username to this connection ID. Later, if you want to send information to a specific user, you can simply query the connection ID corresponding to the user from the stored data, and then send the information.
The process is roughly as follows:
Enter username ➜ Bind username and connection ID and save
User B sends a message to A ➜ Search the stored user name A ➜ Get the connection ID and send
User offline ➜ Delete saved connection ID
Add two interfaces in Hub/IMessageHub.cs:
C#namespace SignalR_Example.Hub
{
    public interface IMessageHub
    {
        Task sendToAllConnections(List<string> message);
        Task JsonDataTransfer(dynamic message);
        Task StringDataTransfer(string message);
    }
}
JsonDataTransferis used to pass JSON object
StringDataTransferis used to pass string
Add several functions in Hub/MessageHub.cs as follows:
C#public static Dictionary<string, string> userInfoDict = new Dictionary<string, string>();
Because it is only a simulation, the storage of data only uses memory storage.
The key of userInfoDict is the user name, and the value is the connection ID.
C#public async Task LoadUserInfo(dynamic message)
{
    dynamic dynParam = JsonConvert.DeserializeObject(Convert.ToString(message));
    string userID = dynParam.userId;
    var ID = Context.ConnectionId;
    userInfoDict[userID] = ID;
    await Clients.Client(ID).StringDataTransfer("Login successfully.");
}
Simulating the frontend, when a user logs in, it sends a JSON object to the backend. After storing the data in the userInfoDict, it will call StringDataTransfer to pass the message "Login successful" back to the frontend.
Context.ConnectionId is a property in the SignalR package used to retrieve the Connection ID of the current connection.
C#public async Task SendToConnection(string userID, string message)
{
    if (userInfoDict.ContainsKey(userID))
    {
        await Clients.Client(userInfoDict[userID]).StringDataTransfer(message);
    }
}
Simulating the frontend, when a user sends a message to another user, it queries the userInfoDict using the userID to check if there is a corresponding connection ID. If a connection ID is found, it uses StringDataTransfer to pass the string message.
C#/// <summary>
/// Automatically obtaining the connection ID
/// </summary>
/// <returns></returns>
public override Task OnConnectedAsync()
{
    //string userId = Context.User.Identity.Name;
    string connectionId = Context.ConnectionId;
    return base.OnConnectedAsync();
}
This is a built-in method in SignalR, which is triggered when a user establishes a connection. Since this simulation assumes that the user needs to input a userID beforehand, it is not tested in this particular section.
C#/// <summary>
/// Disconnecting and automatically removing the connection ID
/// </summary>
/// <param name="exception"></param>
/// <returns></returns>
public override Task OnDisconnectedAsync(Exception exception)
{
    string ID = Context.ConnectionId;
    string userID = string.Empty;
    if (userInfoDict.ContainsValue(ID))
    {
        string key = userInfoDict.FirstOrDefault(x => x.Value == ID).Key;
        userInfoDict.Remove(key);
    }
    return base.OnDisconnectedAsync(exception);
}
This is a built-in method in SignalR, which is triggered when a user disconnects. In this simulation, when a user goes offline, it removes the connection data stored in the userInfoDict.
The above two built-in methods can be tested with breakpoints by themselves.
Hub/MessageHub.cs Complete Code:
C#namespace SignalR_Example.Hub
{
    public class MessageHub: Hub<IMessageHub>
    {
        public async Task sendToAllConnections(List<string> message)
        {
            await Clients.All.sendToAllConnections(message);
        }

        public static Dictionary<string, string> userInfoDict = new Dictionary<string, string>();
        public async Task LoadUserInfo(dynamic message)
        {
            dynamic dynParam = JsonConvert.DeserializeObject(Convert.ToString(message));
            string userID = dynParam.userId;
            var ID = Context.ConnectionId;
            userInfoDict[userID] = ID;
            await Clients.Client(ID).StringDataTransfer("Login successfully.");
        }
        public async Task SendToConnection(string userID, string message)
        {
            if (userInfoDict.ContainsKey(userID))
            {
                await Clients.Client(userInfoDict[userID]).StringDataTransfer(message);
            }
        }

        /// <summary>
        /// Automatically obtaining the connection ID
        /// </summary>
        /// <returns></returns>
        public override Task OnConnectedAsync()
        {
            //string userId = Context.User.Identity.Name;
            string connectionId = Context.ConnectionId;
            return base.OnConnectedAsync();
        }

        /// <summary>
        /// Disconnecting and automatically removing the connection ID
        /// </summary>
        /// <param name="exception"></param>
        /// <returns></returns>
        public override Task OnDisconnectedAsync(Exception exception)
        {
            string ID = Context.ConnectionId;
            string userID = string.Empty;
            if (userInfoDict.ContainsValue(ID))
            {
                string key = userInfoDict.FirstOrDefault(x => x.Value == ID).Key;
                userInfoDict.Remove(key);
            }
            return base.OnDisconnectedAsync(exception);
        }
    }
}
In Controllers/MsgController.cs, add an API for sending information to a specific user, simulating instant messaging through the API.
C#[HttpPost]
[Route("toUser")]
public string toUser([FromBody] JsonElement jobj)
{
    var userID = jobj.GetProperty("userID").GetString();
    var Msg = jobj.GetProperty("msg").GetString();
    if (MessageHub.userInfoDict.ContainsKey(userID))
    {
        messageHub.Clients.Client(MessageHub.userInfoDict[userID]).StringDataTransfer(Msg);
        return "Msg sent successfully to user!";
    }
    else return "Msg sent failed to user!";

}
Front-end Code
🔗Next, is the screen display of the front end, because it is mainly used to test the connection function, and the messages received by the front end will be displayed on the console for convenience.
HTML<!DOCTYPE html>
<html>
<head>
    <meta charset="utf-8" />
    <title>SignalR TEST </title>
    <script src="https://cdn.jsdelivr.net/npm/@microsoft/[email protected]/dist/browser/signalr.min.js"></script>
    <script>
        // Establish SignalR Hub connection
        const hubConnection = new signalR.HubConnectionBuilder()
            .withUrl("https://localhost:7013/messageHub/")
            .build();

        hubConnection.start()
            .then(() => {
                console.log("Connection started");
            });


        // Handle the Login button click event
        function onLoginClick() {
            // Get the user ID entered by the user
            const userId = document.getElementById("userIdInput").value;

            // Wrap the user ID in JSON format
            const jsonData = {
                "userId": userId
            };

            // Use the LoadUserInfo method of SignalR Hub to send the JSON data to the backend
            hubConnection.invoke("LoadUserInfo", jsonData)
                .then(() => {
                    console.log("Data sent successfully!");
                })
                .catch((error) => {
                    console.error(error);
                });
        }


        // Handle the Send button click event
        function onSendClick() {
            // Get the user ID entered by the user
            const userId = document.getElementById("msgUserIdInput").value;
            // Get the message entered by the user
            const msg = document.getElementById("msgInput").value;

            // Use the SendToConnection method of SignalR Hub to send the data to another user
            hubConnection.invoke("SendToConnection", userId, msg)
                .then(() => {
                    console.log("Msg sent successfully!");
                })
                .catch((error) => {
                    console.error(error);
                });
        }

        // Register events of the MessageHub
        hubConnection.on("sendToAllConnections", function (msgs) {
            console.log("To All Connections:", msgs);
        });

        hubConnection.on("StringDataTransfer", (response) => {
            console.log("Received Msg:", response);
        });


    </script>
</head>
<body>
    SignalR TEST
    <hr>
    <label for="userIdInput">Please enter user ID:</label>
    <input type="text" id="userIdInput">
    <button onclick="onLoginClick()">Login</button>
    <hr>
    <label for="msgUserIdInput">User ID:</label>
    <input type="text" id="msgUserIdInput">
    <label for="msgInput">msg:</label>
    <input type="text" id="msgInput">
    <button onclick="onSendClick()">Send</button>

</body>
</html>
Test Results and Conclusion
🔗During the test, you can open multiple web pages and use different userIDs when logging in. You can set breakpoint during the process to view the execution process.
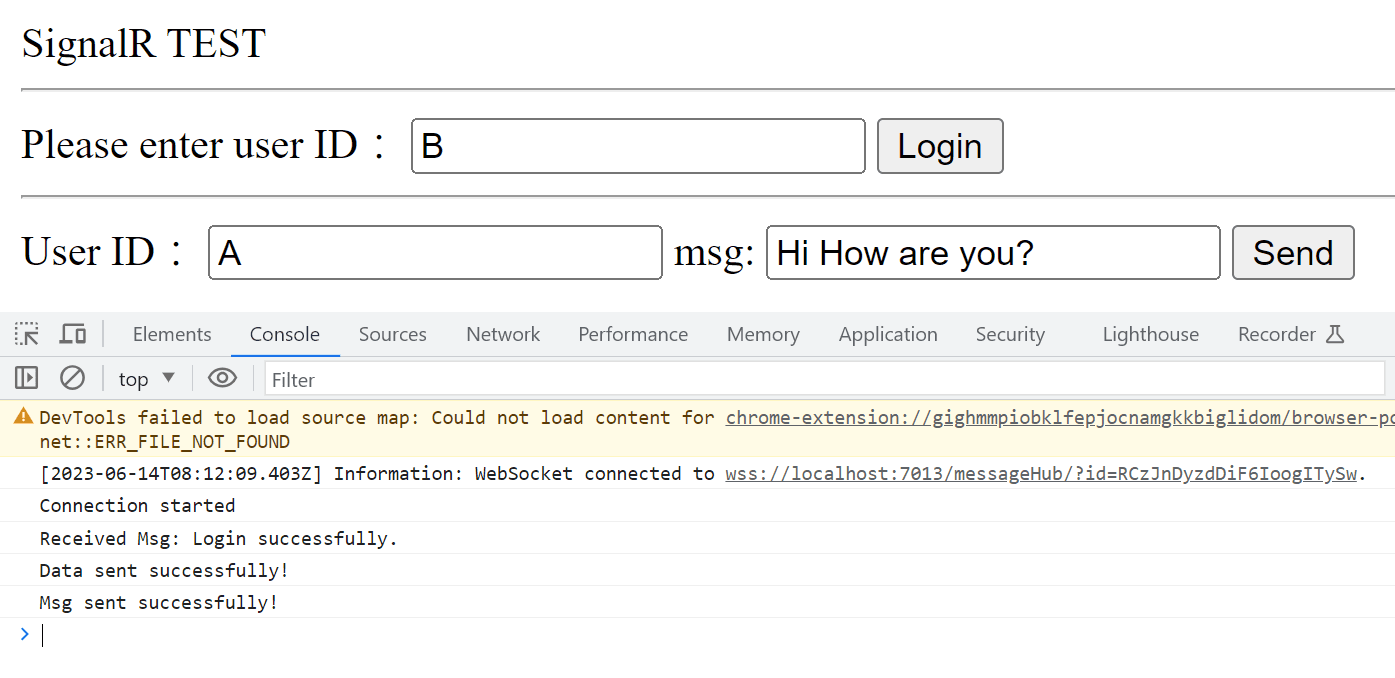
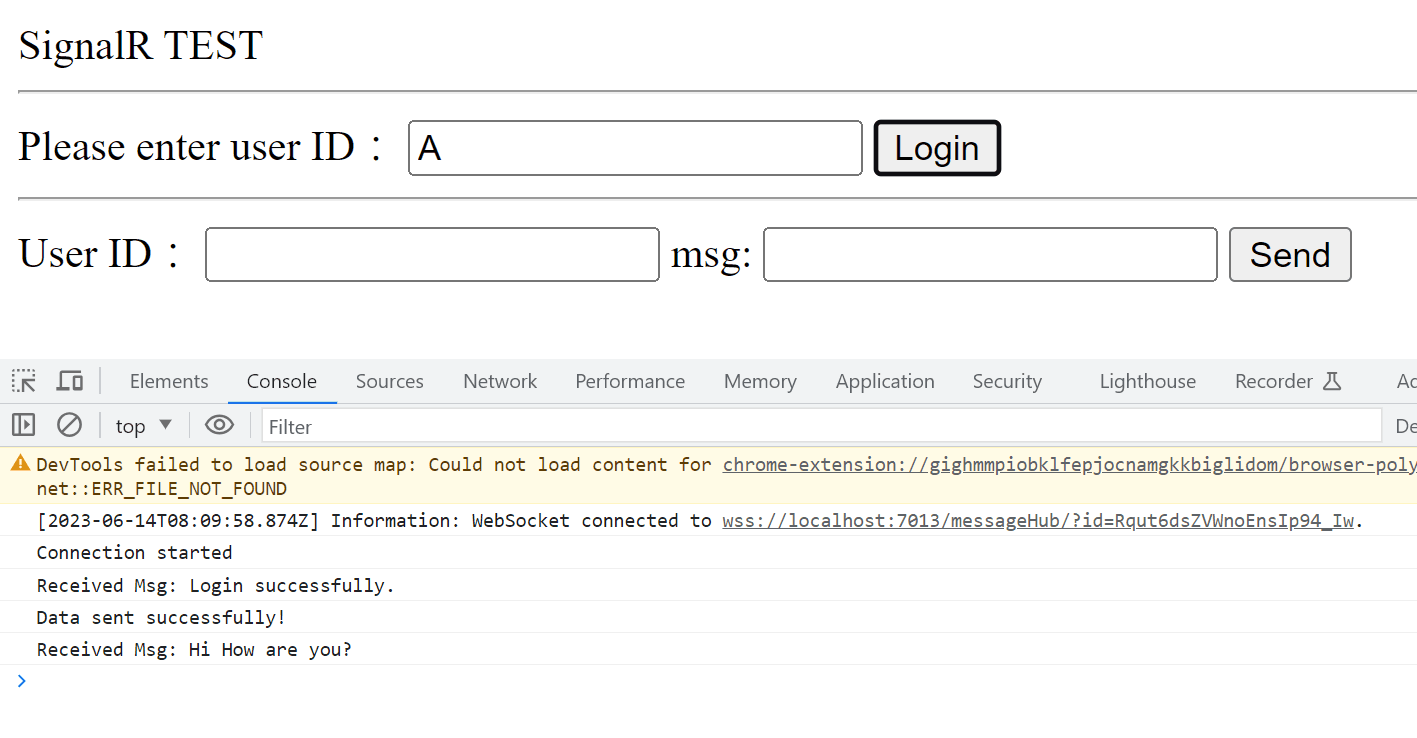
The above is a simple way to implement the instant messaging function using Web API. The process includes binding the user, connection ID and storing, and providing an API for instant messaging to a specific user. Although the front-end screen is a bit crude, it is mainly through testing to understand the principle. Then implement any instant function easily.
The project has been uploaded to Github.
Alvin
Software engineer who dislikes pointless busyness, enjoys solving problems with logic, and strives to find balance between the blind pursuit of achievements and a relaxed lifestyle.

